 how-to
How to Inspect Steep Roofs Safely: A Step-by-Step Guide
Table of Contents
- Before You Start: Roof Pitch, Risk Thresholds, and the No-Go Decision
- How to Inspect a Roof Without Walking on It
- Steep Roof Inspection Safety Equipment You Need
- Roof Inspection Fall Protection Requirements and Setup
- Ladder Selection, Setup, and Roof Access
- What to Check on the Roof: Shingles, Flashing, and Structural Damage
- Steep Roof Inspection Checklist and Photo Documentation
- Emergency Response and Rescue Planning
- Frequently Asked Questions
Last Updated: October 21, 2026
Before You Start: Roof Pitch, Risk Thresholds, and the No-Go Decision
Learning how to inspect steep roofs safely starts with one hard truth: the most dangerous part of a roof inspection is the decision to walk on it at all. Roof pitch is the slope expressed as vertical rise over horizontal run; most guidance treats anything above 6:12 as steep, and many professionals refuse to walk roofs above 8:12 without full fall protection.
How to Measure Roof Pitch Without Climbing
Measure roof pitch from the ground with a level: hold a 12-inch level horizontally against a gable end, mark 12 inches, then measure the vertical rise to the roofline. A 6-inch rise means a 6:12 pitch. Repeat on two or three gables to confirm.
The No-Go Framework: When Walking the Roof Is Off the Table
Walking the roof is off the table when the pitch exceeds 8:12, the surface is wet or frosty, wind gusts are strong, or the roof covering is visibly fragile. Treat these as hard stops, not judgment calls.
- Pitch above 8:12: no walking without a fall protection system
- Wet, icy, or mossy surface: no walking, period
- Loose or missing shingles underfoot: no walking
If any box is checked, move to a ground-level or drone inspection instead.
How to Inspect a Roof Without Walking on It
You can inspect a roof without walking on it by combining a ground-level visual sweep with aerial imaging. This covers the whole roof surface, including steep sections unsafe to walk, and gives you a permanent record.
Ground-Level Visual Inspection: What to Look For
Walk the perimeter and scan the roofline from every angle, using binoculars for higher sections.
- Missing, curled, or loose shingles
- Granule loss on asphalt shingles, visible as bare patches
- Sagging along the ridge or eaves
Note anything that looks off. Photos from the ground help, but they will not show the full roof surface.
Drone and Binocular Inspections for Steep Roofs
Drones have changed steep roof inspection more than any tool in the last decade. A trained pilot can fly a controlled grid, capture high-resolution images of every slope, and document penetrations, flashing, and covering condition without anyone stepping onto the surface.
For homeowners with fragile or hard-to-reach roofs, our thermal roof inspections combine visual and thermal imaging to spot moisture and heat loss that a camera alone misses.
Steep Roof Inspection Safety Equipment You Need
Steep roof inspection safety equipment is the gear that stands between a routine inspection and a hospital visit. Anyone stepping onto a sloped roof needs a defined set of protective gear; ground and drone inspectors need a smaller but still essential kit.
For anyone walking the roof:
- Fall protection system: full-body safety harness, anchor point, and lifeline rated for the load
- Non-slip footwear: soft-rubber soles with deep tread
- Personal protective equipment: hard hat, safety glasses, gloves
For ground and drone inspections:
- Binoculars with good low-light performance
- A camera with optical zoom
- A notebook or phone for photo documentation
Roof Inspection Fall Protection Requirements and Setup
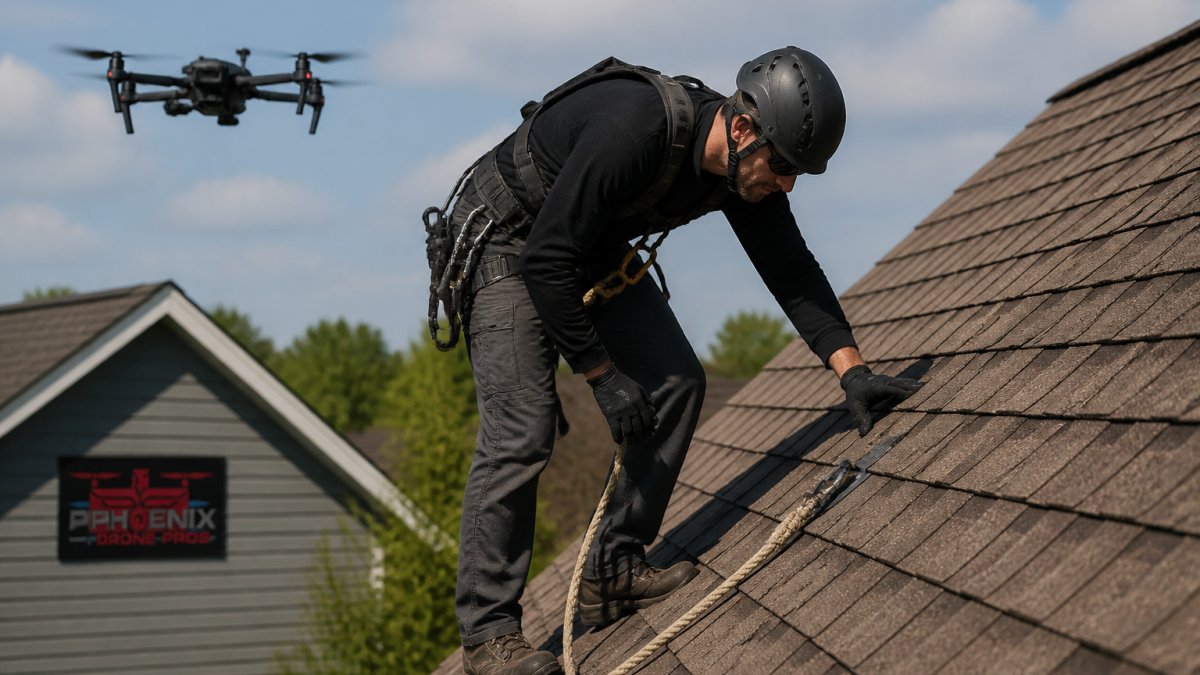
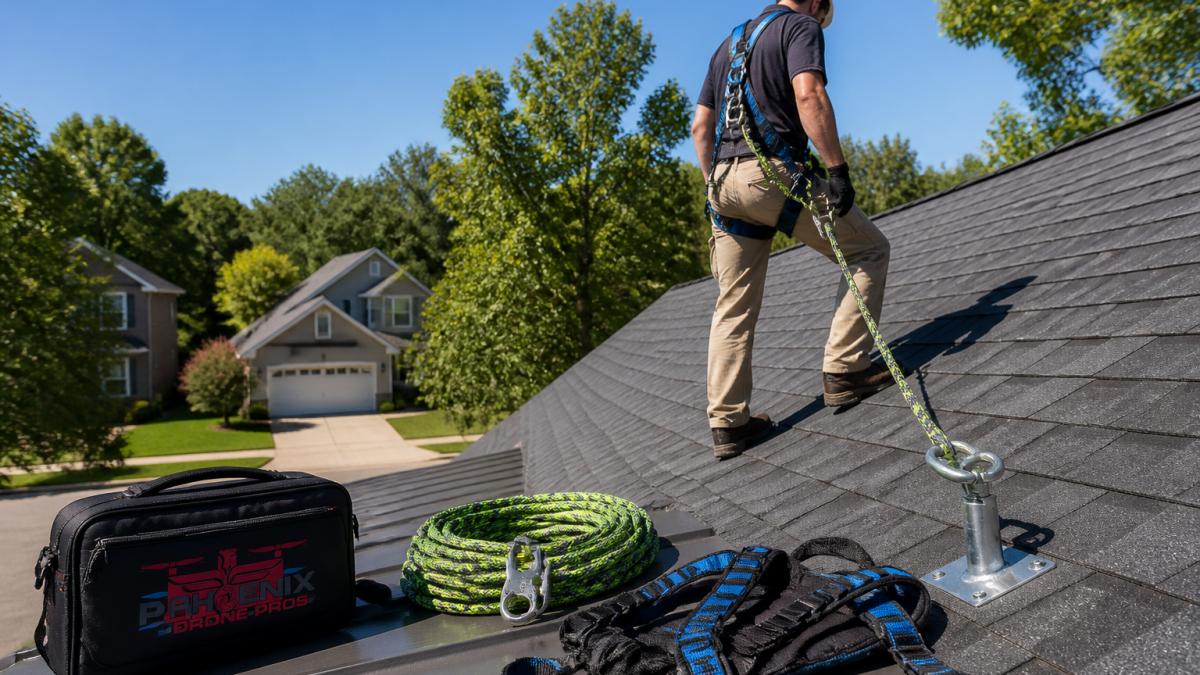
Fall protection requirements for roof inspection follow the general industry standard for working at height: anyone exposed to a fall hazard needs a system that arrests the fall before it reaches the ground, a proper anchor, a harness, and a rated connector.
Know What Counts as a Fall Hazard
A fall hazard exists any time a person can fall to a lower level, and roof work almost always qualifies. Most safety programs require fall protection once a worker is exposed to a fall of roughly six feet or more, or any fall onto a dangerous surface. On a steep roof, the slope turns a short drop into a slide, so exposure starts the moment a boot leaves the ladder.
Pick the Right Anchor Before Anything Else
Roof anchors fall into three families:
- Manufactured roof anchors: purpose-built brackets fastened to the roof structure and rated for fall arrest. They are the most reliable option when installed to the manufacturer's instructions.
- Structural anchors: engineered attachment points on the building frame, used when a manufactured anchor is not available.
- Improvised anchors: never acceptable for fall arrest. A chimney, vent pipe, or satellite mount is not a rated anchor, no matter how solid it feels.
Confirm the anchor is rated for the load, positioned above the work area so the lifeline runs upward, and installed per the manufacturer. If you cannot verify its rating, do not get on the roof.
Step-by-Step Fall Protection Setup
- Inspect the anchor point. Confirm it is rated, secure, and positioned above the work area. Look for corrosion, loose fasteners, or signs it has been loaded in a fall.
- Inspect the harness. Check webbing for cuts, fraying, or UV damage, and confirm buckles and D-ring are intact. A harness that has arrested a fall should be removed from service.
- Put on the full-body harness. Adjust chest, leg, and shoulder straps snug but mobile. The chest strap sits high, and the D-ring rests between the shoulder blades.
- Connect the lanyard or lifeline. Clip into the anchor before stepping onto the roof. Confirm the connector gate closes and locks.
- Check the connection. Tug-test the system and confirm no twists or slack. The lifeline should run upward to the anchor, not sideways or downward.
- Set and secure the ladder. Extend it three feet above the roof edge and tie it off. Make the ladder-to-roof step deliberate.
- Maintain three points of contact. Keep two hands and one foot, or two feet and one hand, on the roof at all times.
- Work within the lifeline radius. Never step past the anchor's coverage. If the work area extends beyond it, reposition the anchor rather than stretching the system.
The OSHA guide to fall protection in construction outlines the general duty to provide fall protection whenever a worker is exposed to a fall hazard, and it is worth reading before any roof work. For homeowners, the practical takeaway is simpler: if you cannot verify the anchor, the harness, and the connection, the roof is not a place to be.
Ladder Selection, Setup, and Roof Access
Ladder safety is where most roof access accidents start. A ladder that shifts, sinks, or slips turns a controlled climb into a fall, so choose the right ladder, set it correctly, and treat the ladder-to-roof transition as its own hazard.
Choose the Right Ladder for the Job
Ladders are rated by duty rating, which reflects the maximum working load including the person and tools:
- Type III (light duty): rated around 200 pounds. Not appropriate for roof work with tools.
- Type II (medium duty): rated around 225 pounds. Marginal for a single person with a small tool bag.
- Type I (heavy duty): rated around 250 pounds. The minimum most practitioners recommend for roof access.
For roof access, an extension ladder is the standard tool; stepladders and folding ladders are not designed for reaching a roof edge. Check the duty rating label before you climb, and add the weight of tools and equipment to your own weight when comparing against the rating.
Set the Ladder Correctly
The setup rules are simple but unforgiving:
- Set the feet on solid, dry ground. Soft soil, gravel, or a wet deck lets a foot sink or slide.
- Angle the base one foot out for every four feet of height. A ladder reaching 16 feet up should have its base about 4 feet from the wall.
- Extend the ladder three feet above the roof edge. That gives a handhold and keeps the top from slipping.
The Ladder-to-Roof Transition
The step from the top of the ladder onto the roof is where many falls begin, because the climber moves from a stable surface to a sloped one. Keep the ladder three feet above the edge for a handhold, step deliberately while keeping three points of contact, and never overreach from the top rungs.
If the roof is steep, fragile, or hard to access, the safest access method is often no access at all. Ground-level and aerial inspection avoid the ladder entirely.
What to Check on the Roof: Shingles, Flashing, and Structural Damage
Once on the roof, or reviewing aerial images, focus on three areas: the roof covering, the penetrations, and the structure underneath.
Roof covering. Look for missing, loose, or damaged shingles, granule loss, and curling edges. These are the first signs of wear.
Flashing and penetrations. Check the metal flashing around chimneys, vents, skylights, and valleys. Lifted or rusted flashing lets water in.
Roof structure. Scan the ridge and eaves for sagging, and check the attic for water stains or daylight.
Steep Roof Inspection Checklist and Photo Documentation
A steep roof inspection checklist keeps the review consistent and makes findings easy to compare over time. Use the same list every visit and photograph each item for a dated record.
- Roof pitch measured and recorded
- No-go conditions checked (weather, surface, pitch)
- Ground-level perimeter scan complete
Label each photo by location and date.
Emergency Response and Rescue Planning
Fall protection only works if someone can reach you after a fall. Before any roof work, agree on a rescue plan: who calls emergency services, where the ladder is, and how the person will be reached.
If the roof is steep, fragile, or hard to access, the safest plan is often to keep people off it entirely.
The hardest part of steep roof inspection is knowing when to stay off the roof.
Frequently Asked Questions
What safety equipment is needed to inspect a steep roof?
For any work at 6 feet or more, OSHA requires fall protection. A complete steep roof inspection safety equipment kit includes a full-body safety harness, a roof anchor point rated for the load, a lifeline or rope grab, non-slip footwear, and a hard hat. Add a ladder stabilizer for access and a fall-protection plan that names a competent person. If you cannot anchor properly or the roof pitch exceeds your comfort and training level, do not go up. Call a professional or use a drone for a steep roof inspection instead.
How can you inspect a steep roof without walking on it?
You can inspect a roof without walking on it by combining a ground-level visual inspection with binoculars, a camera with zoom, and drone photography. Walk the perimeter looking for loose shingles, damaged flashing, sagging, and debris. From the ground, check gutters, vents, and roof edges. A licensed drone pilot can capture close-up images of the roof covering and penetrations, giving you inspection findings without any fall hazard. This method works well for steep roofs and fragile materials.
What is the steepest roof you can walk on?
Most roofing safety guidance treats roofs with a pitch of 8/12 or steeper as too steep to walk without fall protection. A 4/12 to 6/12 pitch is walkable with caution for trained people; 8/12 and above requires a harness and anchor system. Anything above 12/12 is generally a no-go for walking. Measure the roof pitch from the ground using a level and angle finder before deciding. If you are unsure, treat the roof as steep and use ground-based or drone inspection methods.
When should you hire a professional for a steep-roof inspection?
Hire a professional when the roof pitch is 8/12 or steeper, when the roof is wet or windy, when you lack fall protection training and equipment, or when you see sagging, missing shingles, or active leaks. A professional inspection also makes sense for commercial roofs and any roof with fragile materials. For steep roofs, a certified drone inspection service can document conditions safely and quickly. Pricing depends on roof size, access, and deliverable type, so request a quote for current rates.