 blog
How to Prepare for a Drone Roof Inspection in 6 Steps
Last Updated: October 31, 2026
Quick Summary
To prepare for a drone roof inspection, build a written checklist covering property details, access notes, and the questions you want answered, then confirm your pilot's FAA certificate and insurance. Coordinate site access in writing, notify occupants and neighbors, set weather go/no-go thresholds, and plan a zone map and shot list before flight day.
- A drone roof inspection costs $75-$500 versus $200-$600 for a manual ladder inspection.
- Confirm the pilot's remote pilot certificate and proof of insurance before scheduling the flight.
- Site access is the most common reason a scheduled flight gets cancelled and the easiest failure to prevent.
- Set weather thresholds for wind, precipitation, and visibility before the flight day, not on it.
- Ask for raw image files alongside the PDF report so findings stay verifiable later.
Table of Contents
- Why Preparation Decides a Drone Roof Inspection
- Step 1: Build a Drone Roof Inspection Checklist Before You Book
- Step 2: Confirm Your Pilot Meets FAA Rules for Drone Roof Inspection
- Step 3: Coordinate Site Access and Clear the Flight Area
- Step 4: Set Weather Go/No-Go Thresholds
- Step 5: Map the Drone Roof Inspection Process and Capture Plan
- Step 6: Know What to Look for During a Roof Inspection
- What a Drone Roof Inspection Report Should Include
- Frequently Asked Questions
Why Preparation Decides a Drone Roof Inspection
A drone roof inspection costs $75-$500 per property, compared with $200-$600 for a manual ladder inspection, according to Skyebrowse's 2026 cost comparison. That gap is real.
Preparation is the whole game. Locked gates, dead batteries, and high wind are common reasons inspections fail.
Below are six steps that decide whether your inspection is sharp or useless. Before you start, review the benefits of using a drone for roof inspections to see what the service offers.
What Drones Capture That Ladder Inspections Miss
A drone roof inspection is a visual survey conducted with a remote-piloted aircraft carrying a camera, often with a thermal or LiDAR sensor. The drone flies a planned path, captures overlapping images, and software turns them into a viewable record of the roof's condition.
What that gives you over a ladder:
- Full coverage. Ladder inspections see what's reachable. Drone imagery covers the whole plane, including valleys and ridgelines.
- Thermal and infrared data. An infrared sensor reads temperature variations that can point to moisture levels under the membrane. UAV Coach's guide to drone data capture notes pilots commonly collect thermal or LiDAR data alongside standard photos.
- No roof contact. Nobody walks the surface, so fragile tile and steep pitches stay untouched.
Step 1: Build a Drone Roof Inspection Checklist Before You Book
Start with a written drone roof inspection checklist. A good one has three parts: property details, access notes, and the specific questions you want answered.
Most people book a flight and figure out the rest later. That's backwards, the checklist keeps pilot and property owner aligned before anyone shows up.
Property Details and Access Notes
Gather these before the call:
- Full address and roof type (asphalt shingle, tile, metal, flat membrane)
- Approximate roof age and any known problem areas
- Gate codes, lockbox location, or who will open the property
That last item matters more than people expect. A tree canopy overhanging the north slope changes the flight path entirely.
Step 2: Confirm Your Pilot Meets FAA Rules for Drone Roof Inspection
Ask for the pilot's remote pilot certificate and proof of insurance before the flight is scheduled. You can also review what FAA certified drone pilot services cover to verify your provider.
The FAA sets operating limits that shape every flight, and airspace restrictions near airports can require prior authorization. Check current FAA guidance directly for the rules that apply.
Registration matters too. A pilot who can't produce the required paperwork is a liability, not a bargain.
If you're considering learning to fly yourself, our Done flight training covers the fundamentals.
Step 3: Coordinate Site Access and Clear the Flight Area
Site access is the most common reason a scheduled flight gets cancelled, and the easiest failure to prevent.
Confirm Permission in Writing
Verbal permission is not enough when the property is rented, managed, or under contract. Before the flight, confirm in writing who has authority to approve the inspection:
- Owner-occupied: the homeowner's written approval (email or text is fine)
- Rental: landlord approval plus tenant notification
- Managed property: the property manager's approval, with the management company named on the booking
A one-paragraph permission email naming the date, time window, aircraft, and purpose prevents most disputes. Keep it with the flight log.
Notify Occupants and Neighbors
Privacy complaints kill inspections. A quick heads-up prevents most of them:
- Tell tenants or occupants the date and approximate time window, and ask whether anyone has a reason to object (medical equipment, pets, scheduled showings).
- Give adjacent neighbors a heads-up if the flight path will pass near their property line. A short note or door knock is usually enough.
- For multi-unit buildings, post a notice in common areas a day ahead.
A drone hovering over a roof reads as surveillance to someone who wasn't told. Notification isn't a legal formality in most residential cases, it's what keeps the flight from being interrupted.
Identify Hazards Before Launch
Walk the property the day before if you can, and again on arrival. Look for:
- Overhead power lines, service drops, and low branches near the launch and landing zone
- Chimneys, antennas, satellite dishes, and HVAC units that sit above the roof plane
- Skylights and solar panels, both change the flight path and the thermal read
Mark the launch and landing zone with cones if the property is active, and the pilot should have a spotter anywhere near people outside the flight crew.
Coordinate With Property Managers and Site Staff
On commercial, multifamily, or HOA properties, the property manager controls access, scheduling, and sometimes the roof itself. Confirm:
- Gate codes, lockbox location, and who will open the property
- Parking and staging space for the pilot's vehicle
- Any roof-access restrictions (some managers require an escort or a roof-access permit)
Get the property manager's name and mobile number on the booking. The day-of call is the difference between a flight that happens and one that gets rescheduled.
Document the Access Plan
Add the access plan to the pre-flight checklist: who approved the flight, who was notified, where the launch zone is, and who to call on arrival. If the flight is cancelled for access reasons, the log shows why.
Step 4: Set Weather Go/No-Go Thresholds
Set your thresholds before the flight day, not on it.
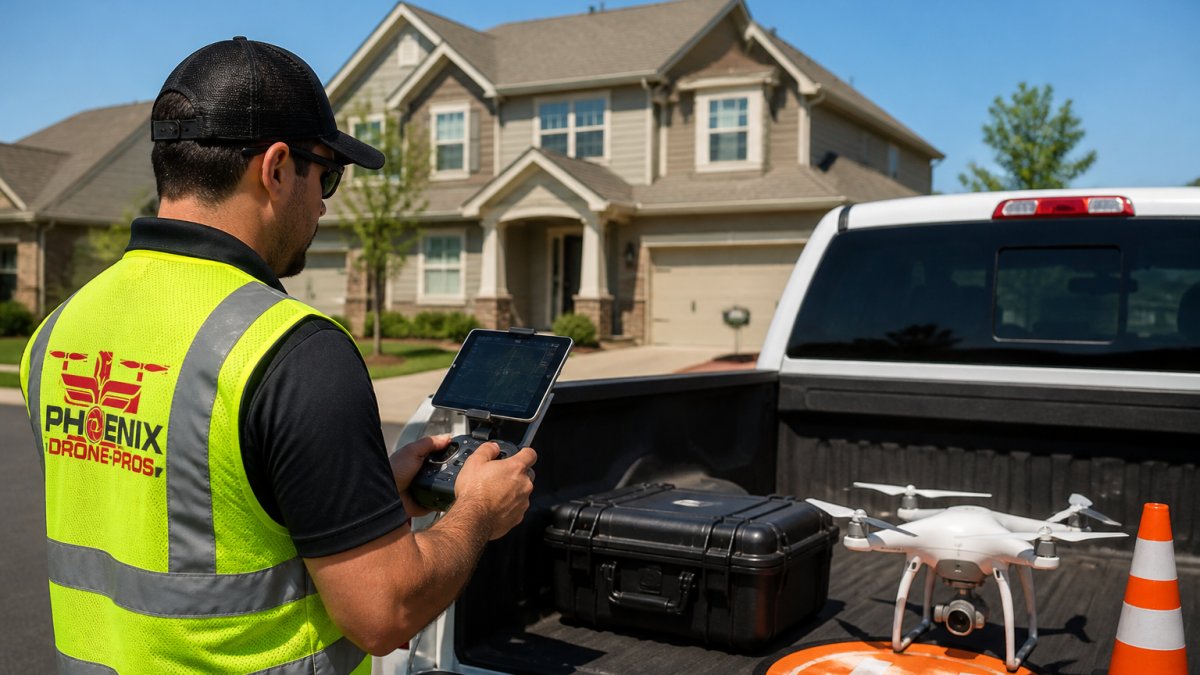
Set clear weather thresholds for wind, precipitation, and visibility before the flight day.
Write the thresholds into the booking. If the forecast breaks them, the flight moves. That's cheaper than flying and re-shooting.
Pushing a flight through marginal wind raises the risk of an accident.
Step 5: Map the Drone Roof Inspection Process and Capture Plan
The drone roof inspection process follows three stages: capture, process, and deliver. Quality is won or lost in the capture plan, which most pilots treat as an afterthought.
Build a Roof-Zone Map Before the Flight
Divide the roof into named zones so every image has a home. A workable scheme for a typical gable roof:
- Zone 1: Front slope (facing street)
- Zone 2: Rear slope
- Zone 3: Left and right slopes
Sketch the zones on a printed satellite view or a simple roof diagram. The pilot flies zone by zone, and the report is organized the same way.
Write a Shot List, Not a Flight Path
A flight path tells the drone where to go. A shot list tells the pilot what the images must prove. A practical shot list for a residential roof:
- Four corner overviews at 45 degrees (one per side)
- Straight-down orthomosaic pass over the full roof at consistent altitude
- Oblique close-ups of each roof plane
Overlap matters. Mapping software needs sufficient image overlap to stitch cleanly. Underlap can leave gaps at ridges and valleys, the exact places defects hide.
Set an Image-Naming Convention
A naming convention turns a memory card into a searchable record. A simple pattern:
YYYY-MM-DD_Address-Shortcode_Zone_ShotType_Sequence
Example: 2026-10-31_1420Oak_Zone5_Valley_003.jpg
Rename on ingest, before editing. Raw files with camera defaults like DJI_0472.JPG lose their locational value the moment they leave the pilot's laptop.
Capture a Baseline Set Every Time
If the same roof will be inspected again, annually, after a storm, at a real-estate transaction, fly the same zones, altitudes, and shot list each time.
Log conditions for every flight: date, time, pilot name, wind speed and direction, cloud cover, and camera settings. Thermal readings are only comparable under similar sun load and time of day.
Plan Batteries Around the Shot List, Not the Clock
Battery endurance depends on wind and payload, so bring spare packs beyond what the shot list appears to require. Check battery condition before flight.
Step 6: Know What to Look for During a Roof Inspection
Knowing what to look for during a roof inspection turns a folder of photos into a decision. For a deeper reference, see common roof defects found by drones. The pilot captures; you or your roofing professional interpret.
Watch for these in the imagery:
- Cracked, missing, or lifted shingles and tiles
- Rust streaks or corrosion on fasteners and flashing
- Ponding water or dark patches on flat roofs
Where Drone Imagery Reaches Its Limits
A drone can't see everything. Drone, walked, and attic-camera inspections are complementary tools. Drone imagery shows surface condition but doesn't confirm what's happening beneath the deck.
Leak assessment is the clearest example.
If you want the deeper comparison, our breakdown of roof thermal scan versus roof walk covers what each method catches.
What a Drone Roof Inspection Report Should Include
A usable drone roof inspection report pairs every finding with a located image and a recommended action. Anything less is a photo dump.
Ask for these before you book:
| Report Element | What It Should Contain | Why It Matters |
|---|---|---|
| Labeled imagery | Each photo tied to a roof section | Lets a roofer find the spot |
| Condition rating | Good, fair, or poor per area | Prioritizes repairs |
| Thermal findings | Temperature anomalies flagged | Points to moisture |
| Action list | Repair, monitor, or no action | Turns data into a plan |
| Deliverable format | PDF plus original image files | Keeps records usable |
The Fact.MR drone inspection market analysis projects demand growing from USD 0.3 billion in 2026 to USD 1.2 billion by 2036. More reports will cross your desk. Knowing what a good one looks like is the skill that matters.
Most roof problems stay hidden until they're expensive. A drone inspection finds them early, but only if the flight is planned, the weather is right, and the report is built to be acted on.
Frequently Asked Questions
What should I do before a drone roof inspection?
Start with a drone roof inspection checklist: note the building's dimensions, roof type, and any access limits, then confirm the pilot's FAA Part 107 certification and insurance. Clear the flight area of vehicles, pets, and bystanders, and check the forecast for wind and rain. Send the pilot any prior inspection reports or known problem areas so the capture plan targets them. Pricing depends on the property and scope, so a short prep conversation protects that spend.
Do I need to be home during a drone roof inspection?
Usually not. Most of the drone roof inspection process happens above the roofline, so the pilot needs access to the yard and a clear launch spot rather than entry into the house. If you want to point out specific concerns, such as a stain on a ceiling or a missing shingle near a chimney, be on site for the first ten minutes or send photos in advance. Otherwise, confirm gate codes and any locked areas with the pilot beforehand.
What should a drone roof inspection report include?
A usable drone roof inspection report pairs high-resolution imagery with labeled locations, so you can match each photo to a roof plane or slope. Look for thermal or infrared sensor data if moisture is a concern, a summary of roof damage such as cracked sealant or lifted flashing, and clear notes on what the pilot could not see. Ask whether the deliverable includes raw image capture files or only edited stills, since adjusters and contractors often want the originals.
Can a drone roof inspection replace a manual inspection?
Not entirely. Drone roof inspection services excel at weathering, deterioration, and surface roof damage across large or steep roofs, and they remove the ladder safety risk. But drone, walked, and attic-camera inspections reveal different conditions, and some problems only show from inside the attic or underfoot. Treat drone imagery as the first pass and schedule a hands-on inspection when the report flags structural concerns or active leak assessment.